Nova – Do it yourself
For the lazy ones you can buy the game produced through thegamecrafter.com link. For those of you who don’t mind doing “craftwork”, here are the instructions to made it by yourselves…
Map printing
The map measures 18 x 18 in. The ideal way to print it is to take it to a copy shop and have it digitally printed by plotter, although it is a bit expensive.
Alternatively the map can be printed on a total of 4 din-a3 sheets or 6 din-a4 sheets, which can then be assembled with paper glue and/or invisible adhesive tape. If possible use a slightly higher quality paper, e.g. 100g.
Some adjustments are necessary before printing:
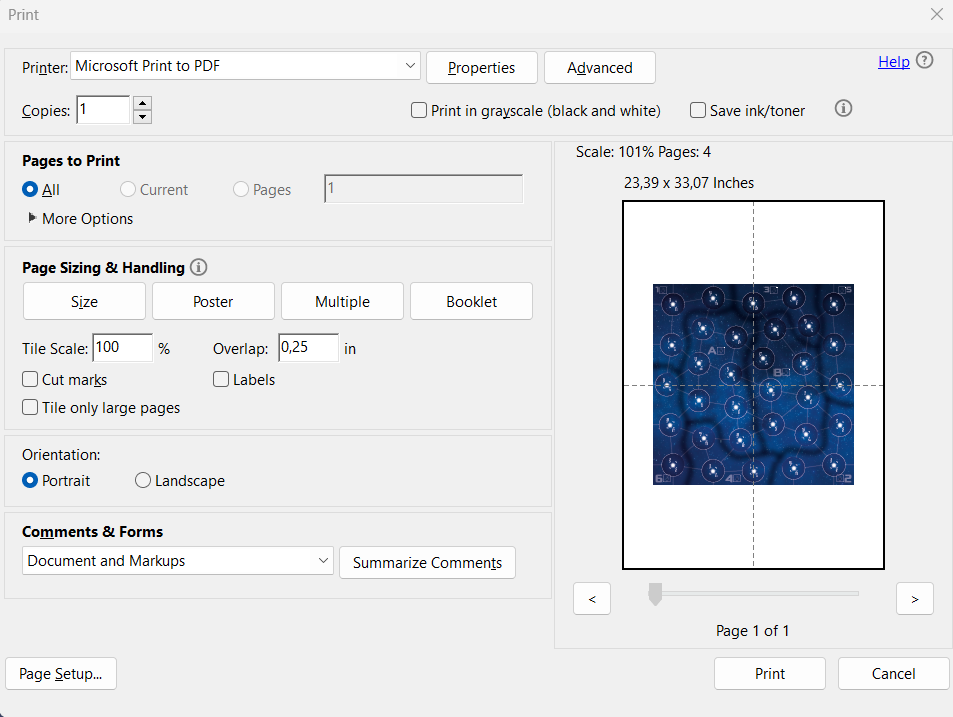
- From the Acrobat Reader print dialog window, in the lower left corner click on the Page Setup button, and in the Page Setup window select A3 size.
- Then click OK and back to the main window of the print dialog box, click on the Poster button, and under it enter Overlap 0.25in (this will be useful when assembling the pieces of the map so that they are not separated by a white line of unprinted paper). In the preview on the right side you will see how the map is split into 4 pieces din-a3.
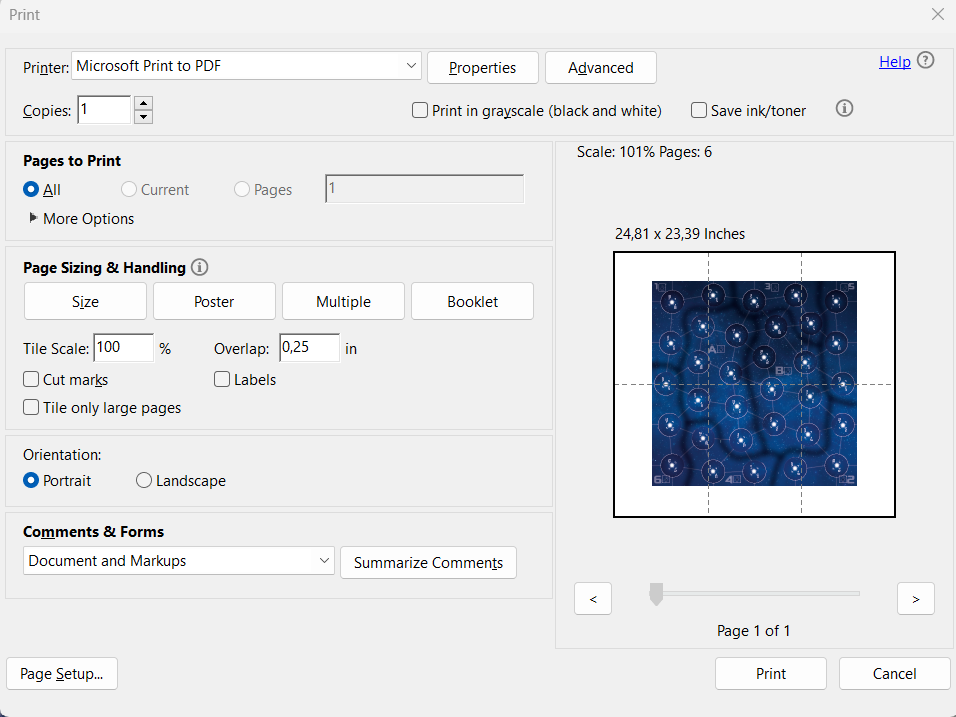
- If you make it in din-a4 it would be like this:
Counters
The counters have two sides, in total there are 6 din-a4 sheets that once assembled will form 2 sheets of counters on both sides and a third one with the player panels.
We recommend that you glue them on both sides on cardboard about 1mm thick. The tokens of commercial board games usually have a thickness of about 2mm, if you do it in that thickness they will look better but it will be more difficult to cut them.
They have a small black frame that serves to prevent them from staining if the glue overflows on the sides, you have to cut them including that frame before gluing them, and then glue them on the cardboard taking care that they are well aligned on both sides.
To glue them you can use contact glue, spray glue for paper, or matte white self-adhesive A4 sheets. We do not recommend glue sticks, as they are very weak and the counters would peel off, or white glue, as the water in the glue could cause the paper on which the counters are printed to wrinkle or bubble.
In any case you must also be very careful when applying the glue, if applied in excess it could damage or dirty the paper where the counters are printed, and if it does not cover the entire surface well, then when cutting the counters some of them could peel off.
Finally to cut them out you can use a circular cutter or scissors (we used scissors, it is faster).
Cards
We recommend printing them on a thick paper (100grs or 120grs) and after cutting them out, put them in 25/8 x 3 5/8 inches plastic sleeves. These sleeves can be purchased in specialized stores in packs of 100, we use the Ultra-pro brand, but there are other brands and many models and qualities. In total the game has 90 cards, so one pack will be enough.
These cards also have face and back, you can print them on separate sheets and then insert both sides already cut inside the sleeves.
Box
To make the box we can’t give you many indications as we haven’t made it ourselves. The PDF file we provide is the same we sent to The Game Crafter and it is slightly larger than a din-a3, which is a problem if you want to print it at a reasonable cost.
The file consists of two pages, one is the cover and the other the back, you could try to print it reducing the scale until each page fits in a din-a3, although you will have to make a smaller box it should not be a problem, think that the box from The Game Crafter is a standard size box and is a little bigger than what the game needs.
In This youtube channel you have information about the tools and techniques to make your own board game.