Ultima Ratio Regis – Do it yourself
Produce the game yourself, here are the instructions … and don’t stop asking your fellow players for help. It is better to stick and cut in company.
Printing the map
The map has 970mm width and 690mm length. The ideal way to print the map is to take it to a copy shop and make a digital impression by plotter, although this system can be expensive.
Alternatively, if you have access to a printer capable of printing in din-a3 format, the map can be printed on a total of 8 din-a3 sheets, to which you will then cut out the unprinted white part of the sheet, and which can be assembled with paper glue and/or invisible adhesive tape.
To print these pieces is recommended:
- If possible, use a quality paper, for example 100g.
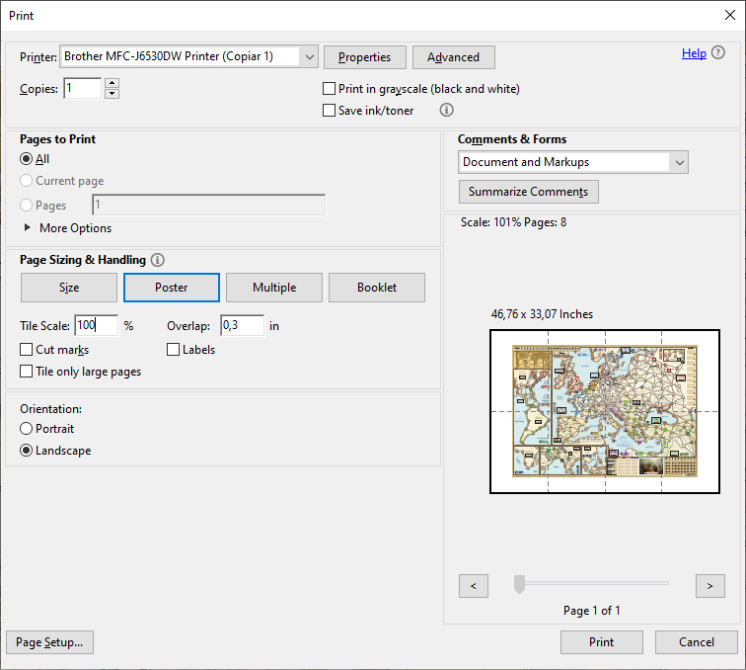
- From the print dialog window of Acrobat Reader, in the lower left corner, click on the Page Setup button, and in the Page Setup window select A3 size.
- Then accept, and back to the main window of the print dialog box, click on the Poster button, and below this, introduce an Overlay of 0,3in (or 8mm) In the preview on the right side you will see how the map is embedded in 8 din-a3 pieces.
If you don’t have access to any of the previous systems, you can try the previous procedure with standard din-a4 size sheets, in this case the main map will have 15 pieces, and to assemble and fit then correctly is going to be complicated.
Counters
There are 8 din-a4 counter sheets that once assembled will form 4 sheets of counters printed on both sides.
It is recommended to stick them on 1mm thick din-a4 size cardboard sheets. Commercial game pieces are usually about 2mm thick, but we don’t recommend that you use this type of cardboard because it will be much harder to cut them out (bear in mind the game has about 800 pieces!).
The counters are totally centered inside the page, so you can paste the full page, it is very important that they are well aligned; otherwise when you cut then, one of the sides would look bad.
To glue them to the cardboard we use contact glue, you can also use white matte self-adhesive A4 sheets, or paper spray glue. It is not recommended to use stick glue, as it is very weak and then the counters could unhook, nor white glue, as having water could wrinkle or buffer the paper where the counters are printed.
You have to be very careful when applying the glue, if it is applied in excess it could damage or dirty the paper where the counters are printed, and if you apply little or it does not cover the whole surface, then when you cut the counters some could unhook.
Finally, to cut them you can use a circular cutter or scissors, in both cases is an arduous task (with scissors is faster).
Power Cards
We recommend to print them on a little thick paper (100grs or 120grs) and after trimming them, to introduce them in plastic sleeves of 25/8 x 3 5/8 inches. These sleeves can be purchased in specialized stores in packs of 100, we use the Ultra-pro brand, but there are other brands and many models and qualities. One 100 sleeves pack will be enough.
These cards also have front and back, and are centered inside the din-a4 sheets, so they could be printed on two sides if desired, or printed on separate sheets and then insert both sides already cut into the sleeve.
Minor power and event cards
It is better to print them on thick paper (100grs or 120grs) and after trimming them, put them into 111/16 x 2 5/8-inch (44x68mm) plastic sleeves. We use the brand Fantasy Flight, model “Mini European Board Game Size” that can be purchased in specialty stores or on the Internet in packs of 50, you will need 3 packs for a total of 146 cards of this size.
Due to the large number of cards, double-sided printing is recommended to reduce the amount of work involved in cutting out the cards.
All these cards are designed to work in gray scale, so you can save the cost of printing them in color.
Box lining
The box printed parts have been divided into 4 din-a3 size sheets; two contain the front and back of the box, and the other two the side pieces. It would have been better to do it in two pieces, one for the top of the box and another for the botton, but then they did not fit in din-a3 sheets, forcing to print them by plotter in a copy shop, which as we have explained before is a little expensive.
To glue then to the cardboard box you can use contact glue, stick glue or spray glue, again it is not advisable to use white glue as it leaves the paper wrinkled and bubbly.
First you must glue the front and back, you will notice that they have some excess flaps that adhere to the sides of the box to ensure that the edges of the cardboard box are covered.
Then glue the long side pieces, which also have side flaps that stick to the short sides of the box (for the same reason). Finally, the short sides are glued.
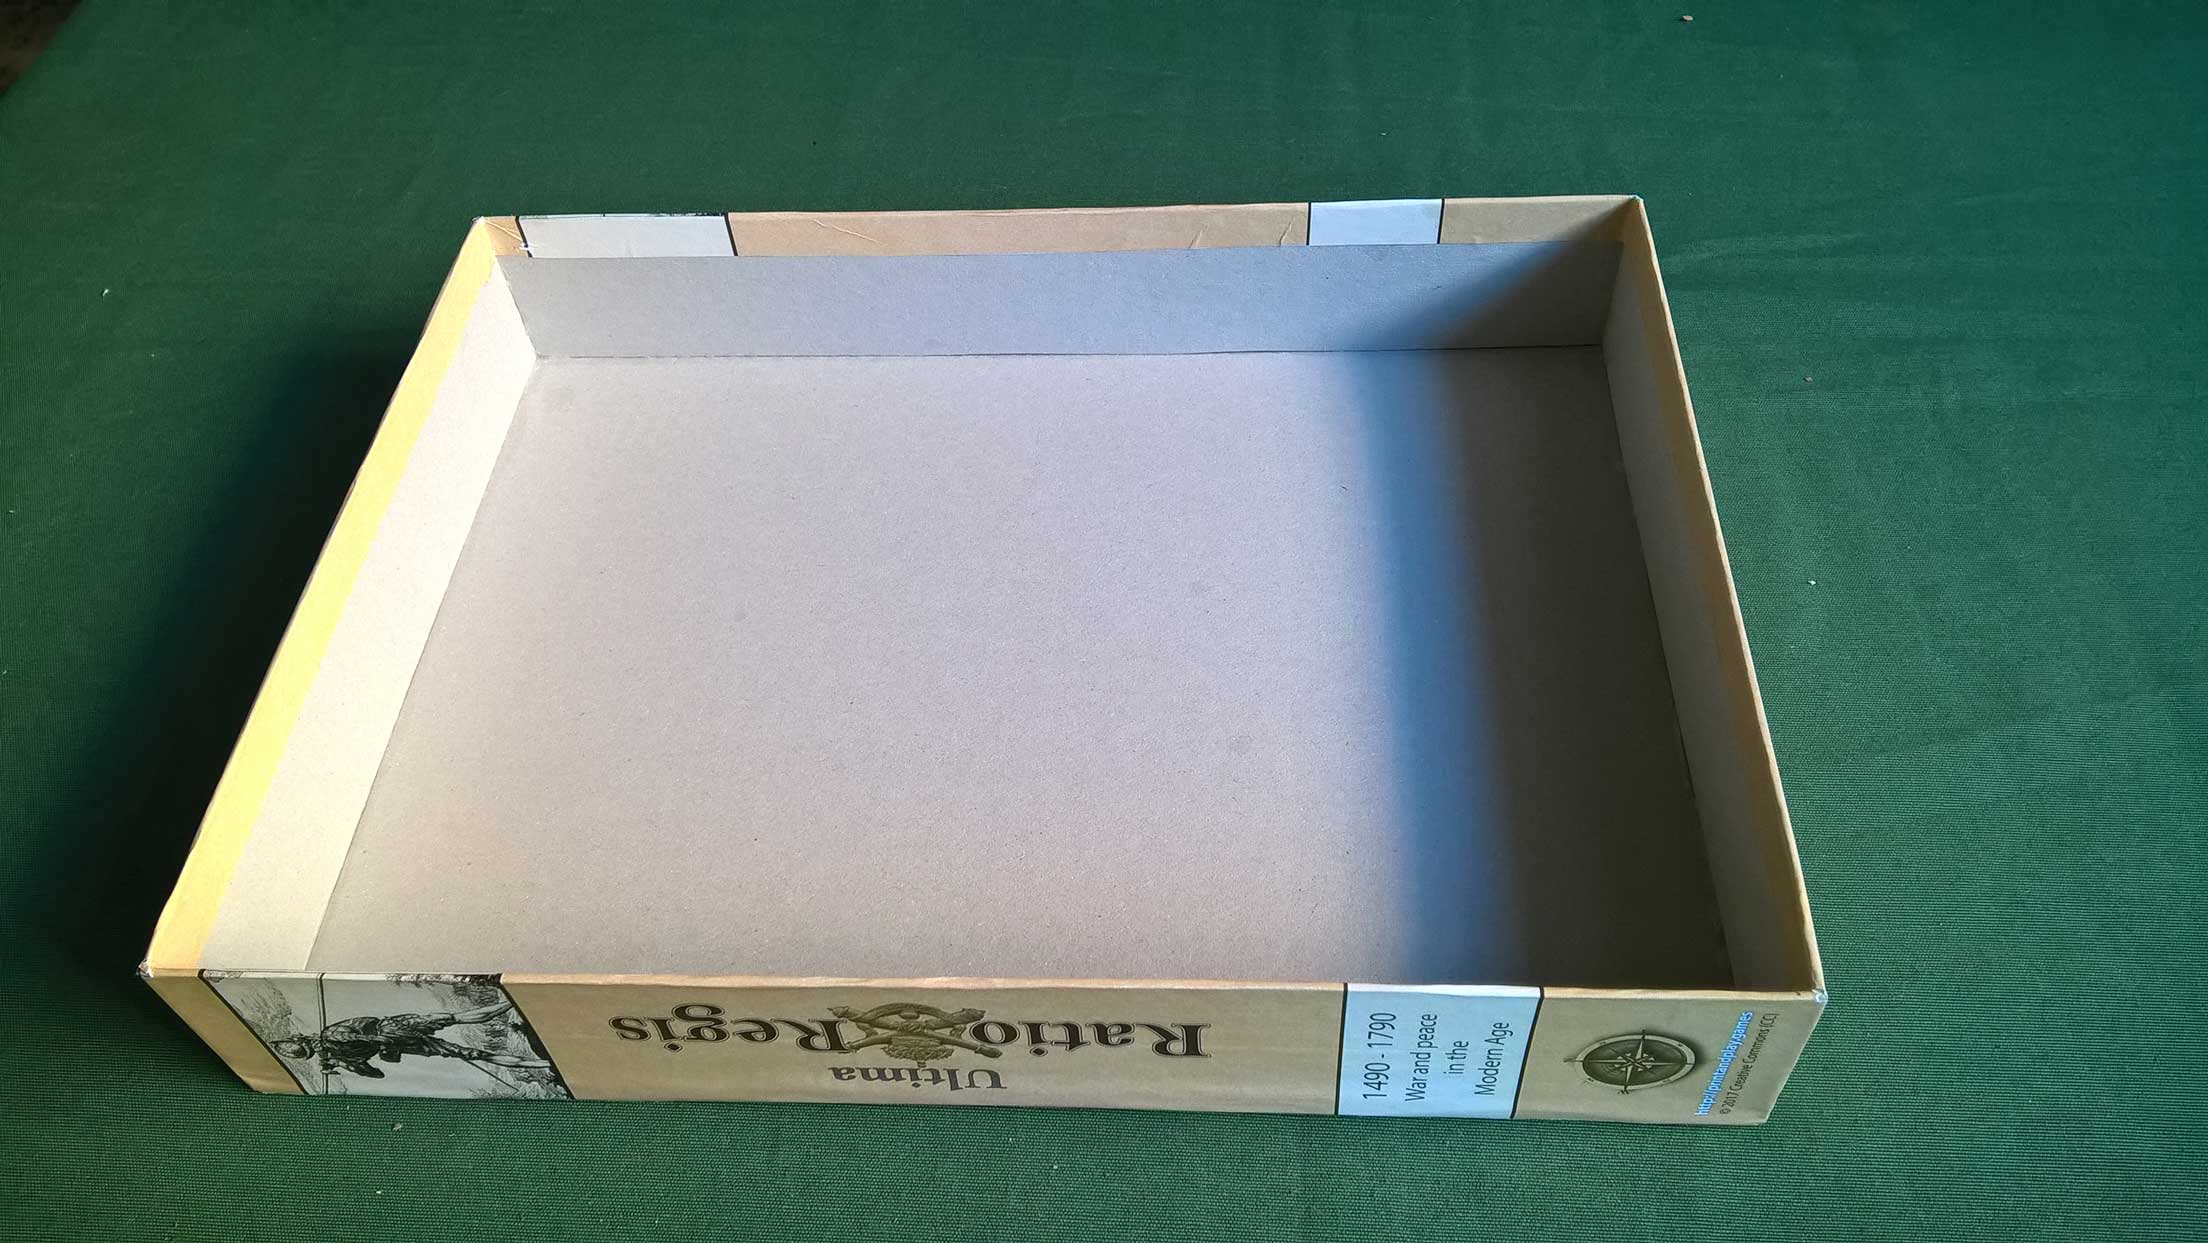
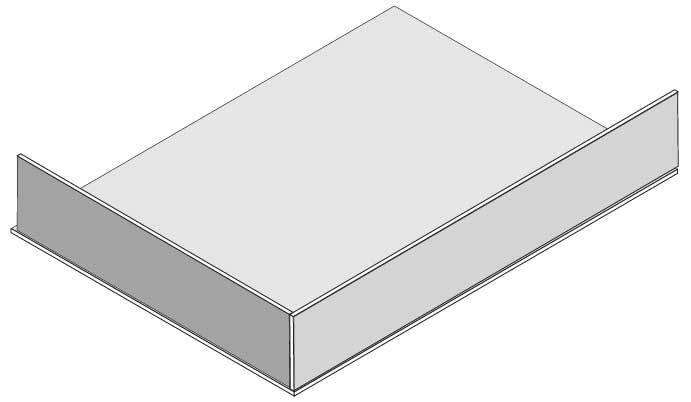
The box has 5cm height, but the printed side pieces are 1.5cm higher, that part folds and glues inside the box, as can be seen in the following photo:
Cardboard box
For the box you will use 1mm thick cardboard (approximately), the pieces that make up the box and its measures are as follows:
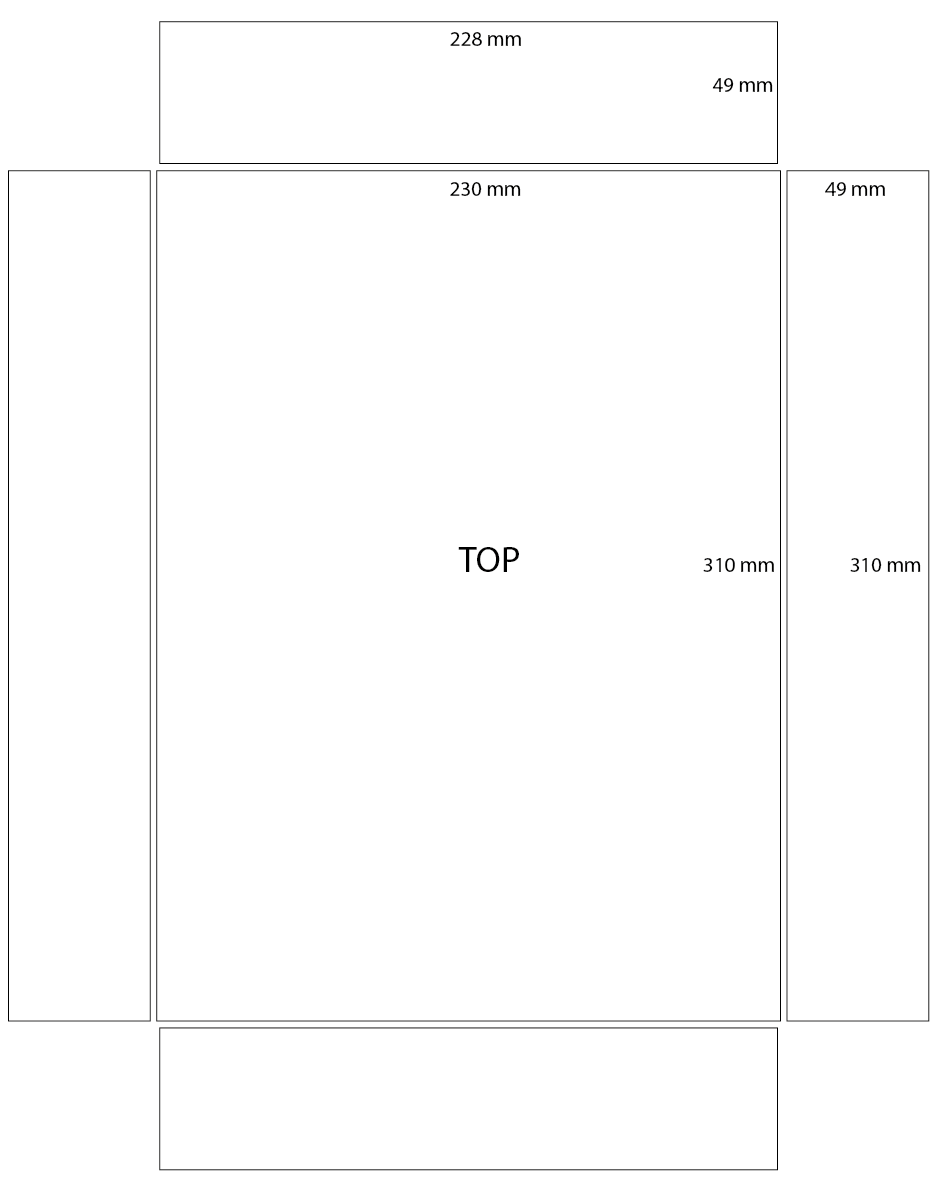
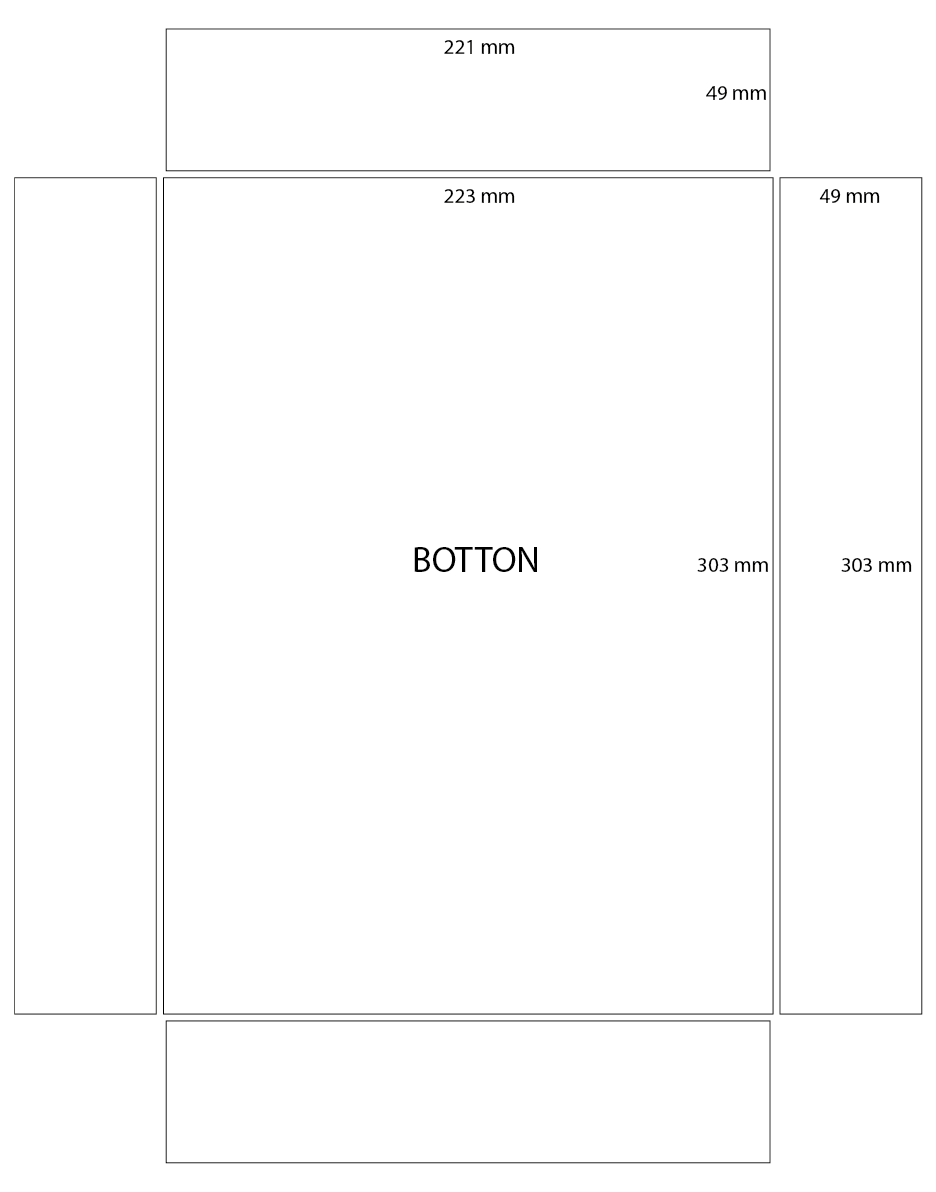
- As you can see, the top is larger than the botton so it can fit over.
- These 10 pieces will be cut individually.
- The sides will be glued mounted on the large top and botton pieces, so that the width and length of the box will not be altered, the height however will increase from 49mm to 50mm due to the 1mm cardboard thickness. The short sides will be glued inside the longer ones, as can be seen in this diagram.
assembling box - Once the pieces have been glued, the joints between the side pieces can be reinforced on the outside (which will be covered with the box lining) with adhesive tape.
In This youtube channel you have information about the tools and techniques to make your own board game.